Posting Your Pictures on the Forum Follow these 4 basic steps to add pictures to your post. |
1. Get the Pictures - A digital camera is the simplest method to use. It's actually best to take the picture using the lowest grade setting on the camera (usually something like "standard" quality) rather than high quality, since the file size will be smaller to start with. A regular film camera can be used, but you will need to digitalize the pictures with a scanner, which any photo processing store can also do for you. It's very important to take the picture of the entire propeller perpendicular to the center of the middle of the propeller. This means that it's best to imagine that the camera is looking straight down the exact middle of the center bore, as in the picture shown below. If the picture is taken from any other point, the normal geometry of the blades becomes very distorted due to the changing angles along the course of each blade. Horizontal orientation is preferred, simply because it reduces the need to scroll down the page on the internet. |
2. Reduce the File Size A perfectly adequate picture can be achieved with a photo size of around 500 by 100 pixels, but first try to create a photo size of 300 x 50 pixels with a file size of under 30 KB. This is done by doing two things. The first is to crop the picture, since almost by definition the propeller itself is not going to fill a typical picture rectangle, and it's useful to get rid of as much background as possible. In Irfanview (which can be downloaded for free from Irfanview's web site), simply open the picture in the viewer by clicking "File" then "Open" then going to the location on your computer that contains the picture to open it. Once the picture is on the screen, click a rectangle around the propeller itself by clicking next to it and dragging the pointer around the propeller image. Then go up to "Edit" and click "Crop selection" and the background will disappear. Go back to "File" and click "Save As". You will then pick a location on your computer and choose a name for the photo. Save it as a JPEG or GIF. The desktop works fine as a location. At this point you can create a photo and name it for storing the photo. On the desktop click "New", then "Folder" then name the folder something like "Forum Photo". You can then click and drag all of your pictures into that folder. The photo file size should be no larger than 64 KB , preferably around 50 KB or less. Right click the photo in your folder and click "Properties" to find the file size. If it's over 64KB you will need to reduce it. There are several ways or steps to do this in Irfanview. (Your own photo editing software may have a simpler method, such as a "reduce resolution" option). Go to "Image", click on "Resize/resample" and change the width of the image to around 300 pixels (or the height, if the picture is taken vertically), then make sure that the "Preserve Aspect Ratio" box is checked in the lower left hand corner. Click "OK". Now check the information box at the bottom of the window. In the middle of it are two "KB" numbers separated by a "/". The first of these tells you roughly what the file size is, and should be around 64KB or less. This size gives a useful image on the internet without taking up too much time to load. Now click "Save As" and rename the picture with an extra letter, like "r" for reduced and save it in the same folder as you saved the original, cropped images. That way you can always go back try another modification from the same basic image, add an extra symbol and save that, etc. At this point you are ready to upload the photos to the internet. |
3. Upload the File to a Server Your photo now needs to be stored in cyberspace on a server, and it will always have an address (or "URL" = "universal resource locator") that tells any computer exactly how to find it. Most ISP's provide some server space for this, and you would need to check with your Internet Provider to find out how to use it. Another option is to use a free photo hosting service. Photobucket seems to work well for this. You need to register and sign up for an account here, click past a few advertisements then follow the instructions to upload your pictures, where they will be stored on their server, each with its own address, and can be added and deleted as you choose. It always helps to carefully write down the exact URL for each image, although one of the nice options with Photobucket is that they have some posting options which not only saves the URL, but adds the "tags" that are needed to post them on the Forum (see #4). The URL ("address on the internet") for the photo on the right seen above is: http://www.woodenpropeller.com/Forumpost2.jpg (If you copy and paste that text into the address bar and hit "enter" it will take you right to the photo, in this case just as if you had clicked on the photo itself in the example above. Try it.) |
1/14/06 rev. 1/18/06 |
4. Link the Photo on the Server to Your Post on the Forum The easiest way to do this to find your photo at the bottom of the page on Photobucket, then go to the bottom box labelled "Img". Carefully left click to select the entire contents of that box (all of the symbols and letters within that box have to be blue at this point). Now right click and while the mouse is still over the blue area, left click on"Copy". Go back to your forum post and put the pointer within the box where you type your response and right click again and then left click "Paste". Your picture should appear, and now you could go back and add another picture if needed. Click "Preview" at the bottom of the screen to check that it uploaded correctly. Please limit your pictures to a maximum of 3, as usually only one is needed. If you used some other method to host your photos, such as your own web site or ISP option, you will need to know the exact url where the image is stored (You can copy that from where it is written to paste on your post). Go to the forum post and in the upper right portion of the screen click the "IMG" box. Now put the entire URL after the "[URL]" that appears in the dialog area, either by pasting or writing the entire URL, then re-click "Close Tag" just below the same "IMG" box to close the tags. Click the "Preview" option to verify that the picture has uploaded correctly. Either way, you have just created the "html" code that gets you to the photo on the internet. This "code" could have been just typed into the post box as: [IMG]http://www.woodenpropeller.com/Forumpost2.jpg[/IMG] Basically, the letters in red should be exactly as shown, but the letters in between will be your own URL for the picture:. [IMG]http://www.woodenpropeller.com/Forumpost2.jpg[/IMG] In both cases, remember that if you delete your photo from your hosting space, it will no longer show up in your forum post, so please leave it on the server for as long as you can. In most cases this can be "forever". |
Note the orientation. The camera "looks" straight down the center bore and
shows the accurate propeller geometry.. |
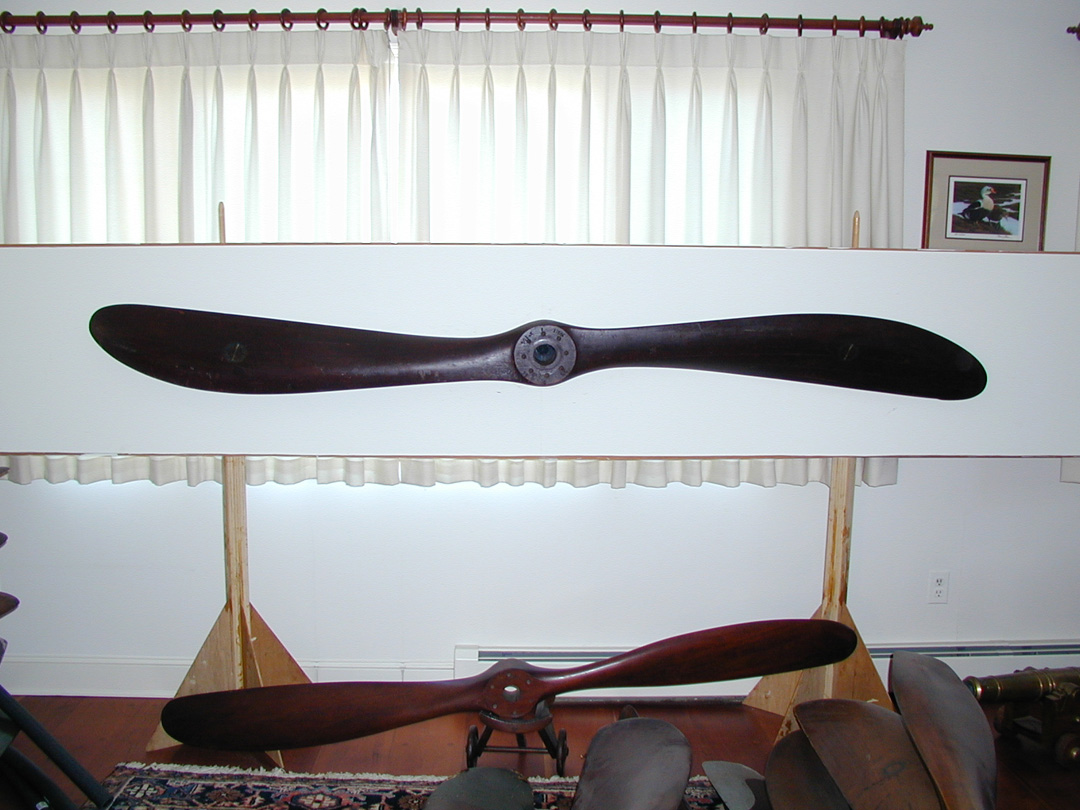
Original photo showing lots of extraneous background. Total size 728 KB, (1080 x 810 pixels) |
Cropped and compressed photo. Total file size is only 12KB. (500 x 83 pixels) |
(Click these to enlarge to the actual sizes described above.) |
Note: While this process may seem complex, it is actually very straighforward and
is worth mastering, whether for this forum or for other uses and forums on the
internet. You may already be familiar with some or all of these steps.
If you don't want to mess with it, go right to the bottom of the page for instructions
on how to have it done for you. These instructions are written for use on the phpBB forum script, but with
some variations will apply to other scripts as well. |
You're done!!! If you've gotten this far and still can't display your photos, go ahead and
contact me and I'll arrange to have you email the photos to me and I'll post them in exchange
for a $5 donation to help run the web site. |